
Table of Contents
- Step 1: Essential Cleaning Supplies for Your New Apartment
- Step 2: Top-to-Bottom Cleaning Strategy for Move-In Cleaning
- Step 3: Deep Clean the Kitchen: Appliances, Cabinets, and Counters
- Step 4: Sanitize and Disinfect the Bathroom
- Step 5: Floors, Baseboards, Walls, and Windows
- Step 6: Closets, Storage Areas, and Post-Cleaning Inspection
- Step 7: How Long Does Move-In Cleaning Take?
- When to Hire Professional Move-In Cleaning Services
- Frequently Asked Questions
Last Updated: September 15, 2026
Step 1: Essential Cleaning Supplies for Your New Apartment
Move-in cleaning starts with the right supplies, not the most supplies (the EPA). A focused kit of essential cleaning supplies for a new apartment covers roughly 90% of what a vacant unit needs, and buying them before the first box arrives saves repeated trips to the store.
Build the kit around three categories:
- Surface cleaners: all-purpose cleaner, a dedicated degreaser for kitchen grease, and a disinfectant for high-touch surfaces
- Tools: microfiber cloths, a scrub brush, a grout brush, and a vacuum with a hose attachment
- Safety and detail items: protective gloves, trash bags, and a squeegee for glass
A common mistake is buying heavily scented products before testing them in a closed apartment. Ventilation matters during a deep clean, especially with older buildings. Many renters find that non-toxic or plant-based cleaners work just as well on everyday grime and leave less residue behind. This guide from North Shore Maids covers the full sequence below, from supplies through a final inspection.
Step 2: Top-to-Bottom Cleaning Strategy for Move-In Cleaning
The top-to-bottom method is the single most important habit for move-in cleaning: start at the ceiling and work downward, so dust and debris fall onto surfaces you have not cleaned yet. Clean each room completely before moving to the next one.
The sequence that works:
- Dust ceiling corners, light fixtures, and vents
- Wipe down walls, trim, and light switches
- Clean cabinet interiors and closets
- Scrub fixtures, counters, and appliances
- Finish with floors and baseboards last
Work left to right within each room as well. It stops you from re-crossing clean floors and cuts total cleaning time noticeably on a two-bedroom apartment.
Step 3: Deep Clean the Kitchen: Appliances, Cabinets, and Counters
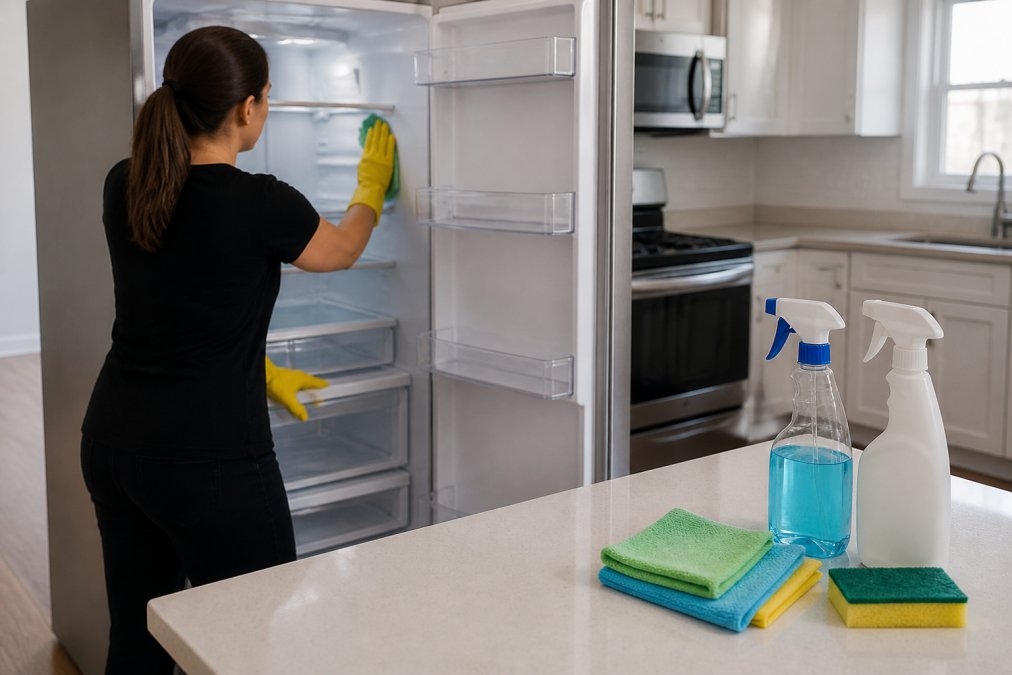
Kitchens hold the most hidden grime in a vacant apartment, and the appliance interior is where it concentrates. Pull out the refrigerator, clean behind it, and wipe down the appliance interior, including shelves, drawers, and door gaskets.
Cabinet interiors collect crumbs and grease film that a quick wipe misses. Wipe shelves with an all-purpose cleaner, then check for residue before putting dishes away. For counters, match the method to the material: sealed stone tolerates most sprays, while laminate scratches under abrasive pads. A degreaser handles the stovetop and range hood filter, which many renters forget entirely.
Step 4: Sanitize and Disinfect the Bathroom
Bathrooms need disinfection, not just cleaning. Cleaning removes visible soil; disinfecting kills germs on high-touch surfaces like faucet handles, toilet seats, and light switches. Those are two different jobs, and a vacant unit needs both.
Focus on the areas that hold moisture and buildup:
- Scrub grout lines with a stiff brush and let the cleaner sit before rinsing
- Disinfect the toilet inside and out, including the base and behind the bowl
- Wipe the exhaust fan cover to support air quality
- Check drain maintenance: a slow drain now becomes a clog later
Never mix bleach and ammonia-based cleaners (the CDC). The combination produces toxic fumes, and bathrooms are exactly where people try it. Use one product, ventilate, then switch.
Step 5: Floors, Baseboards, Walls, and Windows
Floors and baseboards are the last surfaces you touch, because everything above them has already been cleaned. Vacuum first, then sweep or scrub depending on the flooring type. The order matters: if you mop before you wipe baseboards, the dust you knock loose lands on wet floors and dries into streaks.
Match the method to the material. This is where most generic guides stop at “mop the floor,” and where a wrong product does permanent damage:
| Flooring Type | Method | Watch Out For |
|---|---|---|
| Sealed hardwood | Damp microfiber mop wrung nearly dry; pH-neutral cleaner | Standing water warps boards and dulls finish; never steam mop |
| Engineered wood | Same as hardwood, lighter moisture | Thin wear layer scratches under abrasive pads |
| Laminate | Dry mop or slightly damp cloth; manufacturer-approved cleaner | Excess moisture swells seams and voids the warranty |
| Vinyl / LVP | Damp mop, mild cleaner | Rubber-backed mats can stain; avoid abrasive scrubs |
| Ceramic / porcelain tile | Warm water and mild cleaner; scrub grout separately | Harsh acids dull glaze and eat grout |
| Natural stone (marble, travertine) | Stone-safe pH-neutral cleaner only | Vinegar and lemon juice etch the surface permanently |
| Carpet | Vacuum with a HEPA filter, then spot-treat | Over-wetting traps odor and grows mildew underneath |
A quick test before you commit to a product: clean a small, hidden patch first, behind a door or under an appliance, and check it after it dries. That five-minute step prevents a whole-floor mistake.
Baseboards. Wipe them with a damp microfiber cloth and a mild cleaner. Scuff marks usually lift with a dab of all-purpose cleaner or a melamine sponge; skip the sponge on painted or glossy surfaces, where it can dull the finish.
Walls and trim. A damp cloth and mild cleaner handle most of it. For scuffs, a small amount of dish soap on a microfiber cloth works on painted walls; test in a corner first, because flat paint marks easily. Grease splatter near the stove and handprints around light switches are the two spots people miss.
Windows and tracks. Clean the glass and the tracks, which collect grit that streaks every future cleaning. A squeegee used top-to-bottom in overlapping strokes leaves fewer streaks than a cloth. For tracks, vacuum loose debris first, then wipe with a damp cloth wrapped around a butter knife or a dedicated track brush.
Blinds. Dust with a microfiber cloth or a vacuum brush attachment rather than a wet rag, which smears dust into the slats. For deeper grime on plastic or aluminum blinds, wipe each slat with a cloth dampened with mild soapy water, then dry immediately to avoid water spots. Fabric blinds should be vacuumed only; spot-clean with a barely damp cloth and let them air dry fully.
Work the room in one direction and keep a clean and a dirty cloth separate. Swapping cloths mid-room is the single easiest way to stop spreading dust from baseboards back onto freshly cleaned floors.
Step 6: Closets, Storage Areas, and Post-Cleaning Inspection
Closets and storage areas are easy to skip and hard to fix later, because clothes and boxes hide the dust that settles there. Wipe closet shelves, vacuum the floor, and check the top shelf, which most people never reach. Don’t forget the rod itself, it collects dust that transfers to hanging clothes, and the shelf brackets, where dust and cobwebs gather.
The deposit-protection inspection. This is the step most move-in cleaning guides skip entirely, and it’s the one that can save you real money. Your lease almost certainly requires you to return the unit in the same condition you received it, minus normal wear. The only way to prove what was already there is to document it before you unpack a single box.
Run this inspection room by room, and photograph anything that looks pre-existing:
- Wipe every light switch and outlet cover
- Check cabinet interiors for residue and shelf liner left behind
- Confirm baseboards are dust-free
- Test that drains flow freely and note any slow drains
- Look for missed spots under sinks and behind appliances
- Photograph existing scuffs, nail holes, carpet stains, and chipped tile
- Note any appliance dents, scratches, or non-working burners
- Check window screens, blinds, and any torn or bent slats
- Confirm smoke and carbon monoxide detectors are present and working
- Record the date and time on your photos so the record is timestamped
How to document it properly. Take wide shots of each room and close-ups of every defect, with something for scale, a coin or your hand works.
The inspection is what protects your security deposit. Document any pre-existing damage with photos before you unpack, so you are not charged for wear that was already there. Send the photos to your landlord in writing the same day, and keep a copy for your own records.
Step 7: How Long Does Move-In Cleaning Take?
When to Hire Professional Move-In Cleaning Services
Frequently Asked Questions
What are the 7 steps in the apartment move-in cleaning process?
The seven steps are: gather essential supplies; clean top-to-bottom; deep clean the kitchen; sanitize the bathroom; clean floors, baseboards, walls, and windows; tackle closets and storage; and do a final inspection. Following this order prevents recontamination and ensures a thorough move-in cleaning.
Should I clean my apartment before or after moving furniture in?
Always clean before moving furniture in. This allows you to reach every corner, baseboard, and closet without obstacles. It also prevents dust and dirt from settling on your belongings. If you clean after, you’ll have to move heavy items repeatedly, which is inefficient and risks missing hidden areas.
How long does move-in cleaning take for a one-bedroom apartment?
A typical one-bedroom apartment takes 3 to 5 hours for a thorough move-in cleaning. Factors include the apartment’s condition, whether you have help, and the level of detail (e.g., inside appliances, windows). Larger units or those needing extra attention can take 6 to 8 hours or more.
Is it worth hiring professional move-in cleaning services?
Hiring professionals can save time and ensure a deeper clean, especially if you have a tight move-in schedule or mobility limitations. Professional move-in cleaning services use commercial-grade equipment and can handle tough jobs like grout, oven interiors, and windows. It’s a worthwhile investment for many renters and homeowners.
What are the most overlooked areas when cleaning a new apartment?
Often missed: inside cabinets and drawers, window tracks, baseboards, light switches, door handles, and the top of the refrigerator. Also, don’t forget ventilation covers, blinds, and closet shelves. These spots collect dust and germs, so include them in your move-in cleaning checklist.
A move-in deep clean is one of the few chores where doing it right the first time saves real work later. North Shore Maids handles the full scope, from appliance interiors and grout to baseboards and window tracks, backed by a satisfaction guarantee and nearly two decades of local experience. Request a free quote from North Shore Maids and start your lease in a genuinely clean apartment.