
Table of Contents
- How to Deep Clean Baseboards and Grout: What You’ll Need First
- Step 1: Dust and Vacuum Before You Wipe
- Step 2: The Best Way to Clean Dirty Baseboards
- Step 3: Scuffs, Grease, and Hair Spray Residue
- Step 4: How to Clean the Gap Between Tile and Baseboard
- Step 5: A Homemade Grout Cleaner That Works
- How Often to Clean Baseboards and Grout
- Frequently Asked Questions
Last Updated: October 8, 2026
How to Deep Clean Baseboards and Grout: What You’ll Need First
Learning how to deep clean baseboards and grout comes down to one idea: remove the dry mess before you touch anything wet. Dust first, then wash, skip that order and you just smear dirt into a paste. This guide from North Shore Maids walks through the full job using tools most homes already have.
The process takes most people one to two hours for a full home.
The single biggest mistake is wiping before dusting. Dry dust and debris first, always. A damp cloth dragged across a dusty baseboard just pushes grit along the trim and into the grout line.
Supplies Checklist
Gather everything before you start. Running back to the closet mid-job kills momentum.
- Vacuum with a soft brush attachment
- Microfiber cloths (at least four)
- Two buckets: one for cleaning solution, one for rinse water
That list covers both painted baseboards and tile trim. One warning: never mix cleaning products. Combining bleach with ammonia or vinegar creates dangerous fumes. Use one product at a time.
Step 1: Dust and Vacuum Before You Wipe
Dust and vacuum first: loose dirt is the easiest layer to remove and makes every later step work better.
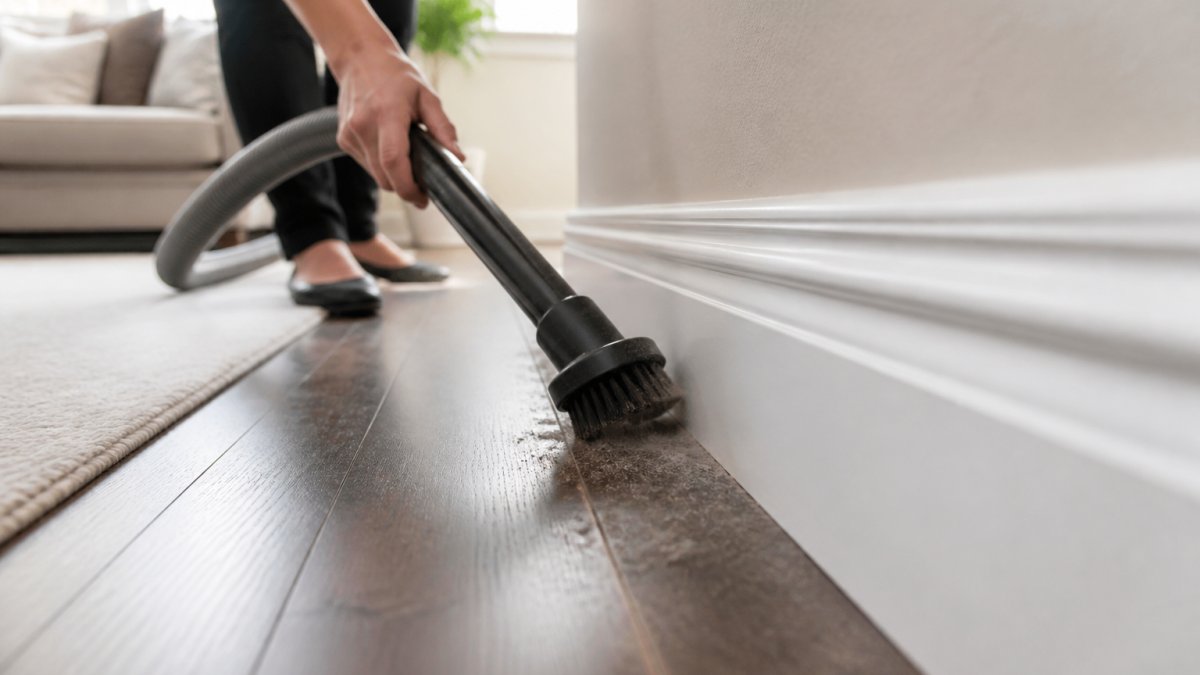
Use the vacuum’s soft brush attachment along the trim, especially the top edge where floor trim meets the wall, that shelf collects dust, pet hair, and cobwebs fastest.
Then run the brush along the floor line, where hair and grit pile up.
For tile baseboards, the same method applies: the brush attachment lifts dust out of the grout line without scratching.
Step 2: The Best Way to Clean Dirty Baseboards
The best way to clean dirty baseboards is a damp microfiber cloth and a gentle soap-and-water mix. Microfiber grabs and holds dirt that a cotton rag just moves around. It also needs less water, which matters on painted surfaces.
Here’s the method:
- Mix a few drops of gentle dish soap into a bucket of warm water.
- Dip a microfiber cloth and wring it out until it’s damp, not dripping.
- Wipe the baseboard in sections, top to bottom.
- Rinse the cloth in clean water often.
- Dry with a separate dry cloth.
Water is the enemy of painted surfaces: standing moisture softens the finish and can cause peeling. Wring that cloth out well.
Choosing a Cleaner by Surface Material
Match the cleaner to the surface material, or you risk dulling the finish. A cleaner that’s safe on tile can ruin painted trim.
| Surface | Safe Cleaner | Avoid |
|---|---|---|
| Painted baseboards | Gentle soap and water | Abrasive powders, harsh solvents |
| Sealed wood trim | Damp cloth, mild soap | Soaking, all-purpose sprays |
| Tile baseboards | Mild all-purpose cleaner | Acidic cleaners on some tile |
| Grout lines | Baking soda paste, soft brush | Stiff wire brushes |
When in doubt, test any solution on a hidden spot first, a small patch behind furniture is perfect.
Never use a magic eraser or abrasive pad on painted baseboards. It scuffs the finish and leaves a dull patch that shows in every light. The damage is permanent and needs repainting to fix.
Step 3: Scuffs, Grease, and Hair Spray Residue
Scuff marks and stubborn marks need spot treatment, not a full re-wash. Most respond to a little friction and the right product.
For scuff marks on painted surfaces, a dab of baking soda on a damp cloth usually lifts them. Rub gently.
Hair spray residue and styling products leave a sticky film that attracts dust, most on baseboards in bathrooms and bedrooms.
Kitchen baseboards collect grease.
- Scuff marks: baking soda paste, light rub
- Hair spray residue: warm soapy water
- Grease buildup: kitchen degreaser, short dwell time
- Stubborn marks: mild all-purpose cleaner, repeat as needed
Step 4: How to Clean the Gap Between Tile and Baseboard
Cleaning the gap between tile and baseboard takes a soft brush and a little patience.
Start with the vacuum brush attachment along the seam.
If the gap has visible grime, spray a mild cleaner into the seam, wait a minute, then brush it out.
For deeper buildup, a baking soda paste and soft brush loosen the grime. Rinse with a damp cloth, then dry.
First, Identify What’s in the Seam
The seam between tile and baseboard is usually filled with one of two materials, which need different care.
- Caulk (most common): A flexible sealant, often white or clear, that bridges the tile-to-baseboard joint. It’s there to keep water out. Caulk is softer than grout and scratches easily, so use only a soft brush and a pH-neutral cleaner. Abrasive powders and stiff brushes dull the caulk surface and can pull it away from the tile.
- Grout: Some installations grout the joint instead of caulking it. Grout is harder and more porous, so it responds to the baking soda paste method in Step 5. If the grout line is cracked or missing, cleaning won’t fix the look, the joint needs regrouting.
If you’re not sure which you have, press a fingernail into the seam. Caulk gives slightly; grout feels hard and gritty.
Tools That Actually Reach the Seam
A flat microfiber cloth glides over the seam without entering it. To reach the corner, you need something with a profile:
- Soft toothbrush: The standard tool. Bristles flex into the corner without scratching tile or trim.
- Detail brush or grout brush: Narrower and stiffer than a toothbrush; useful for grout-filled seams.
- Cotton swab or foam swab: For the last inch of a tight corner where a brush won’t fit.
- Plastic scraper or old credit card: For lifting a bead of old caulk that has failed, not for scrubbing.
Avoid metal tools, a flathead screwdriver, a knife, or steel wool will scratch tile glaze and gouge caulk.
When the Seam Has Mildew
Mildew in this seam shows as black or dark green speckling, often with a musty smell, and usually means moisture is sitting in the joint.
If mildew returns within a few weeks, the caulk has likely failed and is trapping water. The fix is to remove the old caulk, clean and dry the joint, and apply a new bead of mold-resistant silicone caulk.
Never mix bleach with ammonia, vinegar, or any other cleaner. The fumes are dangerous. Use one product at a time, rinse thoroughly, and ventilate the room.
Dry It, Then Keep It Dry
After cleaning, dry the seam with a cloth and let it air out. Standing water feeds mildew and softens caulk; a quick pass with a dry cloth after every mopping keeps the seam from becoming the dirtiest line in the room.
Step 5: A Homemade Grout Cleaner That Works
A homemade grout cleaner made from baking soda and water handles most cement-based grout without harsh chemicals. Mix three parts baking soda with one part water into a thick paste, roughly toothpaste consistency.
Here’s the process:
- Apply the paste along the grout line with your finger or a soft brush.
- Let it sit for five to ten minutes. Dwell time does the work; scrubbing harder does not.
- Scrub gently with a soft toothbrush, moving along the line rather than across it.
- Rinse with a damp microfiber cloth, folding to a clean face as it loads up.
- Dry the area completely with a separate dry cloth.
For greasy kitchen grout, add a few drops of gentle dish soap to the paste. For stubborn marks, a spray of white vinegar can help, but never mix vinegar and baking soda in the same bottle, they neutralize each other.
Match the Method to the Grout Type
Not all grout responds to the same approach. Knowing what you’re standing on prevents damage.
| Grout type | What it is | Best approach | Avoid |
|---|---|---|---|
| Cement-based (sanded) | Most common; sand aggregate for wider joints | Baking soda paste, soft brush, gentle scrub | Acidic cleaners that erode the binder over time |
| Cement-based (unsanded) | Smoother, for narrow joints and wall tile | Mild soap and water, soft brush | Stiff brushes that gouge narrow lines |
| Epoxy | Resin-based, non-porous, stain-resistant | Warm water and mild soap; soft cloth | Abrasive powders and scrubbing pads |
| Sealed grout | Cement grout with a penetrating sealer | pH-neutral cleaner; reapply sealer per product directions | Harsh acids that strip the sealer |
If you don’t know which you have, test a hidden line first, behind the toilet or under the refrigerator. A few drops of vinegar on cement grout will fizz slightly; on epoxy it won’t. That fizz is the acid reacting with the cement binder, which is why repeated vinegar use dulls cement grout.
Brush Selection Matters More Than Product
A soft toothbrush is the workhorse for grout lines: its bristles reach into the joint without scratching tile edges. For wider lines, typically 1/8 inch and up, a grout brush with stiffer nylon bristles covers more ground per stroke.
For floor grout, a brush with a handle saves your back. For wall grout, a toothbrush or a small detail brush gives better control.
Rinse and Residue: The Step Most People Skip
Baking soda leaves a white film if it isn’t fully rinsed, and that film attracts dust and makes grout look dingy within days. Rinse with a damp microfiber cloth, wringing and refolding frequently, until the cloth comes away clean, then dry with a separate cloth.
If the rinse water in your bucket turns gray quickly, dump it and start fresh. Rinsing with dirty water just redistributes the grime you lifted.
Sealing cement grout after a deep clean slows future staining. A penetrating sealer applied to clean, dry grout every 12 to 18 months is a common maintenance interval. Follow the product’s directions for cure time before exposing the grout to water.
When Homemade Isn’t Enough
Some grout problems need more than baking soda. Mildew, black or dark green speckling that returns after cleaning, usually means moisture is trapped behind the tile or in the grout.
For rust stains, a commercial rust remover formulated for tile and grout is the reliable option; homemade pastes rarely lift rust and can set it deeper. Test any commercial product on a hidden line first.
How Often to Clean Baseboards and Grout
How often to clean baseboards and grout depends on the room and the traffic.
Grout needs less frequent attention: a deep clean every three to six months keeps tile sharp in most rooms, though high-traffic kitchens and bathrooms may need it more often.
- High-traffic rooms: dust monthly, deep clean quarterly
- Low-traffic rooms: dust every six to eight weeks
- Kitchens and bathrooms: check grout every two months
- After a deep clean: spot clean as needed
A quick pass with a dry cloth between deep cleans keeps dust from building up. It’s far easier to maintain a clean baseboard than to rescue a dirty one.
Frequently Asked Questions
How do you deep clean baseboards and grout?
Work in two stages. First, dust and vacuum the baseboards and grout lines to remove loose dirt. Then wipe baseboards with a damp microfiber cloth and a mild cleaner suited to the surface, scrubbing scuffs with a soft brush. For grout, apply a baking soda paste or a homemade grout cleaner, work it in with a soft toothbrush, and rinse. Dry everything with a clean cloth to prevent moisture streaks.
Can you use vinegar to clean baseboards and grout?
Vinegar mixed with warm water works well on most painted baseboards and on ceramic or porcelain tile grout. Avoid it on natural stone such as marble or travertine, because the acid can etch the surface. Never combine vinegar with bleach, since the mixture releases dangerous fumes. Test any cleaner on a hidden spot first, then rinse and dry the area thoroughly.
What tools do you need to clean baseboards and grout?
Gather a vacuum with a brush attachment, microfiber cloths, a soft toothbrush, a mild dish soap or dedicated cleaner, baking soda, and two buckets, one for cleaning solution and one for rinse water. A grout brush reaches narrow gaps between tile and baseboard. Keep a dry cloth on hand for finishing.
How often should you deep clean baseboards and grout?
Dust baseboards monthly and deep clean them every three to six months. Grout in high-traffic areas like kitchens and bathrooms benefits from a deep clean every two to three months, while sealed grout in low-traffic rooms can go six months. Households with pets, kids, or allergy sufferers should lean toward the shorter end of these ranges.
Baseboards and grout are the details most people skip, and they’re the first thing guests notice in a spotless room. If the job keeps sliding down your list, North Shore Maids can take it off your hands. The team brings nearly two decades of experience, bonded and insured staff, and flexible weekly, bi-weekly, monthly, or seasonal plans. Get started with North Shore Maids and reclaim your weekends.