
Last Updated: November 17, 2026
Quick Summary
Move out cleaning for pet owners follows one rule: work top to bottom, dry to wet, and back to front, cleaning ceilings, vents, and walls first and floors last. Pet hair removal works in layers: dry removal with a rubber squeegee or stiff brush, then vacuuming with a HEPA filter, then a sticky roller. Pet odor removal requires extracting the carpet and treating the pad and subfloor with an enzyme cleaner, since air fresheners only cover urine odor.
- A one-bedroom apartment with one pet takes 60-120 minutes on carpets and rugs, then 6-12 hours to dry.
- Vacuum in two directions, not one, because fast passes leave hair in the carpet backing.
- Enzyme cleaners break down the proteins in urine rather than bleaching the stain.
- Keep pets out of treated rooms until surfaces are completely dry to avoid irritated paws and skin.
- Photograph every pet-related mark with a date stamp and compare against your move-in condition report.
Table of Contents
- Why Pet Messes Test a Standard Move-Out Clean
- Your Move-Out Cleaning Checklist for Pet Owners, Room by Room
- Pet Hair Removal Before Moving Out: Floors, Furniture, and Corners
- Pet Odor Removal From Carpet: Extraction, Enzymes, and Air
- Walls, Doors, Trim, and Baseboards: The Scuff and Dander Layer
- Pet Damage, Deposit Deductions, and What to Document
- Move-Out Cleaning Cost for Pet Owners: DIY vs. a Professional Crew
- Book Your Pet-Focused Move-Out Clean Before the Walkthrough
- Frequently Asked Questions
Why Pet Messes Test a Standard Move-Out Clean
A standard move-out clean assumes dust, grease, and maybe a few scuff marks. Pets rewrite that list.
Pet hair is more than a vacuuming problem. It involves filtration, chemistry, and documentation.
Landlords often inspect for odor, not just appearance.
Below, you’ll find a room-by-room plan, a checklist you can print, and clear guidance on what to document before you hand back the keys.
Your Move-Out Cleaning Checklist for Pet Owners, Room by Room
A move-out cleaning checklist for pet owners should follow one rule: work top to bottom, dry to wet, and back to front. Clean ceilings, vents, and walls first. Then furniture and surfaces. Floors come last, because everything above them drops down.
Typical timing for a one-bedroom apartment with one pet, done alone (actual time varies by unit and condition):
| Room or Area | Time Estimate | Frequency During Clean |
|---|---|---|
| Kitchen | 60-90 minutes | Once, plus degreasing pass |
| Bathroom | 30-45 minutes | Once |
| Closets and storage | 20-30 minutes | Once |
| Living areas and furniture | 60-90 minutes | Vacuum twice |
| Carpets and rugs | 60-120 minutes | Extract, then dry 6-12 hours |
| Walls, doors, trim | 45-60 minutes | Once |
| Final walkthrough | 20 minutes | Last |
Time Estimate
Two people cut that roughly in half.
Kitchen and Bathroom: Grease, Grime, and Litter Box Residue
The kitchen is where pet bowls sat, so check the floor edges and the cabinet toe-kick for dried food and water rings. Pull the fridge and stove out if you can.
In the bathroom, the litter box corner needs the most attention. Scoop, then wash the floor beneath it. Urine crystals stick to grout and baseboard caulk. A common mistake is mopping over that residue instead of scrubbing it out first.
- Degrease the range hood and cabinet fronts
- Clean inside the oven and fridge if the lease requires it
- Scrub the litter box corner and grout lines
- Wash baseboards behind the toilet and under the sink
Closets, Storage Areas, and the Spots Nobody Checks
Closets collect fur because pets sleep there. Vacuum the shelf edges, the closet floor, and the corners where a broom cannot reach.
Storage areas and utility closets hide the worst of it. Look behind the water heater, along the wall base, and under shelving.
Do not forget the laundry area. Lint plus pet hair clogs the dryer vent screen and the floor beneath it.
Pet Hair Removal Before Moving Out: Floors, Furniture, and Corners
Pet hair removal before moving out works best in layers: dry removal first, then vacuuming with a HEPA filter, then a sticky roller for what is left.
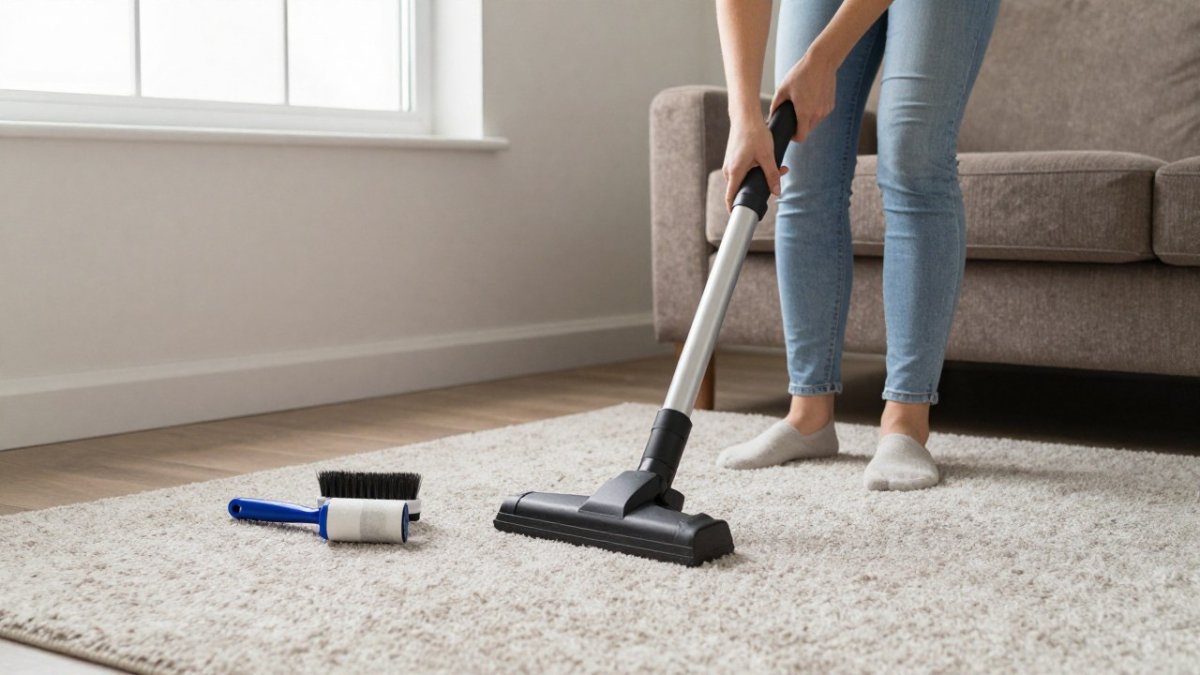
Start with a rubber squeegee or a stiff brush on carpet. Pull it across the pile and the fur balls up.
On hard floors, sweep first, then vacuum, then damp mop. Baseboard corners and the gap under cabinet edges trap the most fur.
Upholstery needs its own pass. Use the brush attachment, then a sticky roller.
- Vacuum in two directions, not one
- Use a HEPA filter to keep dander from blowing back out
- Finish corners with a damp cloth, not a dry one
- Roll upholstery last, after it dries
Pet Odor Removal From Carpet: Extraction, Enzymes, and Air
Pet odor removal from carpet requires reaching the source, not masking the surface. That means extracting the carpet, treating the pad and subfloor with an enzyme cleaner, and ventilating until dry.
Here is the sequence that works:
- Vacuum thoroughly and remove any solid waste
- Test a small area with the cleaner you plan to use
- Apply an enzyme cleaner and let it dwell per the label
- Extract with a carpet cleaning machine, or blot heavily by hand
- Dry fast with fans and open windows
An enzyme cleaner is a cleaning product that uses enzymes to break down the proteins in urine, vomit, and other organic stains.
Watch out: over-wetting carpet without fast drying can create a musty smell that reads as pet odor to a landlord.
Choosing Pet-Safe Products by Surface and Hazard
Match the product to the surface, and read the label before you buy. No product is risk-free, so treat every cleaner as something to keep away from pets until surfaces are dry.
- Carpet and pad: enzyme-based cleaners formulated for urine. Avoid anything that leaves a sticky residue, because residue attracts dirt and dander.
- Hard floors: mild detergent and water. Skip bleach on sealed wood or laminate, because it can dull or discolor the finish.
- Grout and caulk: a soft brush and an enzyme cleaner. Do not scrub aggressively, because damaged caulk traps odor.
- Upholstery: a fabric-appropriate cleaner tested on a hidden area first. Enzyme products work on protein-based stains but can affect some dyes.
Watch out: never mix bleach with ammonia-based cleaners, because the fumes are dangerous. Many pet stain products contain ammonia or oxidizers, so check labels before combining anything.
Ventilation, Drying, and Keeping Pets Away
Ventilation is part of the cleaning, not an afterthought. Open windows, run fans, and use a dehumidifier if the unit is humid.
Keep pets out of treated rooms until surfaces are completely dry. Wet cleaner residue can irritate paws and skin, and pets may lick treated carpet.
- Close doors to treated rooms and use a baby gate if needed
- Put away pet bowls, beds, and toys before treating the area
- Wash your hands after handling cleaners and before handling pets
- Store all products out of reach, ideally in a locked cabinet
If the smell returns after the carpet dries, the urine reached the pad or subfloor. That is usually the point where DIY cleaning is insufficient.
Walls, Doors, Trim, and Baseboards: The Scuff and Dander Layer
Walls and trim carry a layer most people cannot see until they wipe it: pet dander mixed with dust and cooking film.
Baseboards take the brunt of it. Pets brush along them, so expect fur, drool marks, and scuffs at nose height.
Doors need attention at the bottom edge and around the frame, where a tail or paw has left marks.
- Wipe walls top to bottom with a damp cloth
- Scrub baseboards by hand, corner to corner
- Clean door frames, edges, and handles
- Note any scratches or chew marks for your documentation
Pet Damage, Deposit Deductions, and What to Document
Documentation protects the security deposit. Photograph every pet-related mark, stain, or scratch before and after cleaning, with a date stamp.
Landlords can generally deduct only for damage beyond normal wear, and requirements vary, so check your lease and local rules.
For a full playbook on recovering deductions, see how to get your security deposit back after moving out. And if you need to prove the unit’s condition, this step-by-step guide to documenting apartment condition before moving out shows exactly what to photograph and when.
A common mistake is handing over keys before the walkthrough. Schedule the inspection first, walk it with the landlord, and get the condition report signed.
A Photo Checklist for Pet-Related Condition
Photograph each item in good light, with a date stamp, and keep the files organized by room. A common pattern is to shoot wide, then close, then a reference shot that shows the room context.
- Carpet: wide shots of each room, close-ups of stains, and a shot of the pad if you lifted the carpet
- Walls and trim: baseboards at pet height, door frames, and any chew marks
- Doors: bottom edges and frames, where paws and tails leave marks
- Floors: scratches on hard flooring and any lifted seams
- Odor sources: litter box corners, pet beds, and any area where accidents happened
Compare these against your move-in photos or condition report. If you did not take move-in photos, check whether the landlord’s report describes the pre-existing condition.
Species-Specific Damage to Look For
Different pets leave different evidence, and knowing what to look for helps you clean the right spots and document honestly.
- Dogs: scratched door frames and floors, chewed baseboards and furniture corners, urine stains on carpet near doors, and muddy paw prints on hard floors.
- Cats: urine odor in carpet and pad, scratch marks on door frames and furniture, litter tracked into corners, and hair worked into upholstery.
- Small animals (rabbits, guinea pigs, hamsters): bedding debris, chewed cage edges and baseboards, and urine stains under cages.
- Birds: droppings on surfaces below perches, feather dust on walls and vents, and seed hulls in carpet.
Watch out: cleaning a stain does not erase damage. If carpet is torn, flooring is scratched through the finish, or drywall is chewed, document it and discuss it with the landlord before the walkthrough rather than hiding it.
Move-Out Cleaning Cost for Pet Owners: DIY vs. a Professional Crew
Move-out cleaning cost for pet owners depends on pet count, carpet square footage, and whether urine reached the pad. DIY costs are supplies plus your time.
DIY makes sense for light fur, a small unit, and no odor problem.
For a direct cost-and-time comparison, read professional cleaning vs DIY move-out cleaning. If you are unsure what a crew actually covers, this breakdown of what is included in a standard move out clean answers that before you commit.
Watch out: a cheap quote that skips carpet extraction will not remove odor. Ask what equipment and products the crew uses before you book.
Book Your Pet-Focused Move-Out Clean Before the Walkthrough
The gap between a good clean and a failed inspection usually comes down to odor and documentation.
Before you book, run through this checklist:
- Confirm the walkthrough date and time
- Photograph all pet damage with a date stamp
- Decide DIY vs. professional based on odor and carpet condition
- Ask the crew about extraction equipment and pet-safe products
- Get a written estimate covering carpets, walls, and baseboards
Ready to book? Review these checks before hiring a move-in move-out cleaning service so you know what to ask, then request a free estimate and get the unit inspection-ready.
Pet messes turn a routine turnover into a real project, and the walkthrough will not wait.
Frequently Asked Questions
What should pet owners clean before moving out to protect the deposit?
Focus on what a landlord inspection actually checks: pet hair in carpets and corners, urine odor in carpet padding, scratches on doors and trim, and dander on baseboards and vents. Vacuum with a HEPA filter, shampoo carpets, wipe walls and baseboards, and clean the litter box area last. Photograph every room after cleaning so you have a dated record if a deduction is disputed.
How much does move-out cleaning cost for pet owners?
Move-out cleaning cost for pet owners depends on square footage, carpet condition, the number of pets, and whether odor treatment is needed. Pet hair and odor work adds time beyond a standard clean. Request a written estimate based on your unit, and ask specifically whether carpet extraction and enzyme treatment are included or billed separately.
Can I get pet odor out of carpet myself before the inspection?
Surface cleaning helps, but urine soaks into padding and subfloor, so shampooing alone often leaves odor behind. Use an enzyme cleaner made for pet accidents, give it dwell time, then extract with a wet vacuum. If odor returns when the room warms up, the padding likely needs replacement, which is a job for a professional or your landlord’s contractor.
When is DIY cleaning not enough after having pets?
If carpets stay damp or smelly after extraction, if urine reached the subfloor, or if chewing and scratch damage is visible, DIY cleaning will not fix it. In those cases, hire a professional move-out clean and document the damage with photos before the final walkthrough so you can discuss repairs with your landlord directly.
