
Last Updated: November 8, 2026
Quick Summary
Natural deep cleaning uses white vinegar, baking soda, and hydrogen peroxide instead of harsh chemical sprays to sanitize bathroom surfaces. Vinegar and baking soda handle soap scum and mineral deposits as well as many conventional products when used correctly, because technique matters more than the ingredient. Dwell time, scrubbing action, and surface compatibility decide the outcome.
- Dilute white vinegar with equal parts water and let it dwell five to ten minutes before wiping.
- Mix baking soda with water into a paste for a mild abrasive that scrubs toilet bowls and sinks.
- Spray undiluted white vinegar on shower glass and tile, wait ten minutes, then scrub.
- Pour half a cup of baking soda and a cup of white vinegar into the toilet bowl, fizz ten minutes, then scrub and flush.
- Never mix vinegar with bleach, because the combination releases dangerous chlorine gas.
Table of Contents
- Why Natural Deep Cleaning Alternatives for Bathroom Make Sense
- Homemade Bathroom Cleaner Recipes That Actually Work
- Natural Shower Cleaner: Tackling Soap Scum and Mildew
- Natural Tile and Grout Cleaner for Bathroom Floors and Walls
- Bleach-Free Bathroom Cleaner Options for Toilets and Hard Water Stains
- Store-Bought Natural Cleaners vs. DIY: A Practical Comparison
- Safety and Surface Compatibility: What to Avoid
- Book a Professional Natural Deep Clean with North Shore Maids
- Frequently Asked Questions
Why Natural Deep Cleaning Alternatives for Bathroom Make Sense
Natural deep cleaning is the practice of using household ingredients like white vinegar, baking soda, and hydrogen peroxide instead of harsh chemical sprays to sanitize bathroom surfaces.
A common mistake is assuming “natural” means “weak.” Vinegar and baking soda can handle soap scum and mineral deposits as well as many conventional products when used correctly.
EPA Safer Choice program guidance notes that many conventional bathroom cleaners carry ventilation warnings for a reason. That alone pushes plenty of families toward homemade bathroom cleaner options.
Homemade Bathroom Cleaner Recipes That Actually Work
These three recipes cover most bathroom surfaces. Each uses ingredients found in any grocery store.
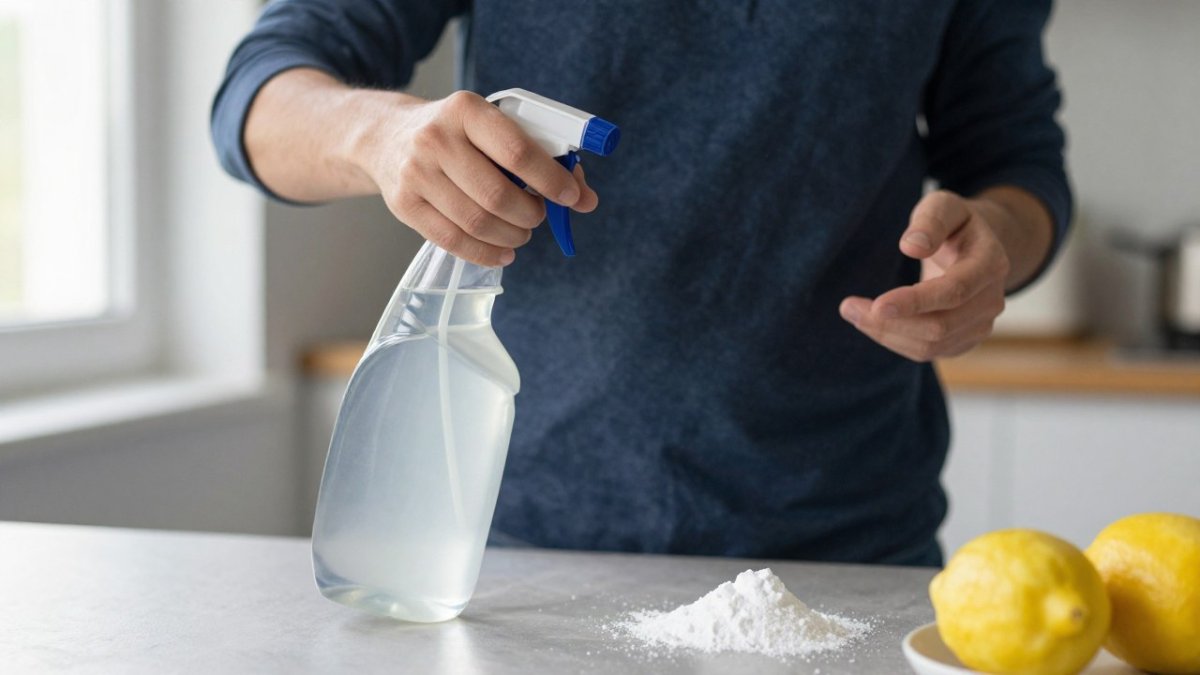
All-Purpose Vinegar Spray
White vinegar diluted with equal parts water in a spray bottle handles everyday grime on tile, glass, and fixtures. Spray, let it dwell five to ten minutes, then wipe. For scented vinegar, steep citrus peels in the bottle for a week before use.
Baking Soda Paste for Stains and Scrub Power
Mix baking soda with enough water to form a paste. Apply to stains, let it sit, then scrub with a brush. Baking soda works as a mild abrasive cleaner without scratching most surfaces, making it a strong choice for the toilet bowl and sink stains.
Hydrogen Peroxide and Dish Soap Blend
Combine hydrogen peroxide with a few drops of dish soap in a spray bottle. This bleach-free bathroom cleaner works well on mildew-prone grout lines. Spray, wait, scrub, and rinse. Keep the blend out of direct sunlight.
Natural Shower Cleaner: Tackling Soap Scum and Mildew
A natural shower cleaner works best with heat and dwell time, not elbow grease alone.
For mildew on grout and caulk, a baking soda paste with a splash of hydrogen peroxide pulls stains out of porous lines. A common mistake is scrubbing dry.
Ventilation matters as much as the recipe. Running the exhaust fan during and after cleaning keeps moisture down and slows mildew regrowth.
Natural Tile and Grout Cleaner for Bathroom Floors and Walls
The best natural tile and grout cleaner depends on what the surface is made of and what is sitting on it. Glazed ceramic and porcelain tile tolerate a baking soda and vinegar approach well. Unglazed quarry tile, cementitious grout, and natural stone behave differently and need a gentler plan. Match the method to the material before you mix anything.
The standard baking soda and vinegar method for glazed tile and sealed grout
Sprinkle baking soda along the grout lines and across dull tile, spray with white vinegar, and let it fizz for five to ten minutes. The reaction lifts loose soil and the baking soda supplies mild abrasion. Scrub grout lines with a stiff nylon brush and tile faces with a non-scratch pad, then rinse thoroughly with clean water so residue does not dry into a white haze. A second rinse is cheap insurance on dark grout.
Dwell time matters more than pressure. Dwell time matters, and a few minutes of contact often does more than extra scrubbing. Work in sections of a few square feet so the mixture does not dry before you rinse.
Hard-water scale and soap scum on tile
For calcium and magnesium scale, undiluted white vinegar is the workhorse. Soak a cloth or paper towel in vinegar, press it against the scale line, and leave it for fifteen to twenty minutes before scrubbing. Warm the surface first, cleaning right after a shower helps, because heat speeds the acid’s reaction with mineral deposits. For heavy scale, a second application beats a longer single soak.
Grout: sealed versus unsealed
Sealed grout handles the baking soda and vinegar method. Unsealed grout is porous and absorbs liquid, so a wet slurry can drive soil deeper. On unsealed grout, use a damp baking soda paste, scrub, and rinse quickly rather than flooding the lines. If water beads on the grout, it is sealed; if it darkens and soaks in, it is not.
Natural stone and other sensitive surfaces
Acid etches calcium-based stone permanently. Do not use vinegar on marble, travertine, limestone, or onyx, and do not let vinegar spray drift onto those surfaces from adjacent tile.
Metal finishes are a separate risk. Vinegar can pit or discolor some metal finishes with repeated exposure. Wipe fixtures with a damp cloth and mild soap, and keep acid sprays off them.
Watch out: always patch-test an inconspicuous corner, behind the toilet, under a rug, or in a closet, and wait twenty-four hours before treating the whole floor. Etching and dulling can appear after the surface dries, not while it is wet.
Tools and sequence for floors and walls
Work top to bottom so soil does not land on cleaned surfaces. Start with walls and the upper tile, then the tub and shower surround, then the floor and baseboards. Use a stiff grout brush on lines, a non-scratch pad on tile, and a squeegee or clean towel to pull standing water toward the drain.
How to deep clean baseboards and grout walks through the full sequence for floors and edges if the grout needs more than a spot treatment.
Bleach-Free Bathroom Cleaner Options for Toilets and Hard Water Stains
A bleach-free bathroom cleaner for the toilet bowl starts with baking soda and vinegar.
Hard-water stains on fixtures respond to white vinegar dwell time. Soak a cloth in vinegar, press it against the stain, and leave it for twenty minutes.
Watch out: never mix vinegar with bleach. The combination releases chlorine gas, which is dangerous in a closed bathroom. Keep the two strictly separate, and rinse surfaces between uses.
Store-Bought Natural Cleaners vs. DIY: A Practical Comparison
Most guides stop at “DIY saves money, store-bought saves time.” That is true but not useful when you are standing in the bathroom with a specific mess. The better question is which option works on this soil, on this surface, at an acceptable cost and effort. Compare by task, not by category.
Task-by-task comparison
| Task | Soil type | Strongest natural option | Store-bought natural option | Trade-off |
|---|---|---|---|---|
| Shower glass and tile | Soap scum, light scale | Undiluted white vinegar, 10-minute dwell | Surfactant-based natural shower spray | DIY needs dwell time; store-bought clings better to vertical glass |
| Grout lines | Mildew, embedded soil | Baking soda paste plus hydrogen peroxide | Oxygen-bleach natural grout gel | DIY is cheaper per use; gels stay put on vertical lines |
| Toilet bowl ring | Mineral deposits, organic stain | Baking soda and vinegar fizz, then pumice on porcelain | Natural toilet gel with citric acid | DIY requires scrubbing; gels cling under the rim |
| Fixtures and chrome | Water spots, fingerprints | Diluted dish soap and water | Natural multi-surface spray | DIY is gentler on finishes; sprays add scent |
| Floors | Dust, hair, light soil | Warm water and a few drops of dish soap | Natural floor cleaner concentrate | DIY needs wringing and rinsing; concentrates dilute predictably |
| Mildew-prone caulk | Mildew staining | Hydrogen peroxide and dish soap blend | Natural mildew remover | DIY has a short shelf life; store-bought is stabilized |
Cost per use, effort, and shelf life
DIY ingredients are inexpensive per bottle, but the real cost includes your time: mixing, dwell time, scrubbing, and rinsing. A vinegar spray costs pennies per use in materials but adds minutes of dwell time to every task. A baking soda paste costs little but demands scrubbing.
Store-bought natural cleaners are typically sold ready to use, which removes guesswork on dilution.
Cleaning versus sanitizing versus disinfecting
This is where most comparisons go quiet. Cleaning removes soil and a large share of germs mechanically. Sanitizing reduces bacteria to a level judged safe by a public health standard. Disinfecting destroys or inactivates nearly all recognized pathogens on a surface. Vinegar, baking soda, and dish soap are cleaners; they are not registered disinfectants. A DIY blend of peroxide and dish soap is not a registered disinfectant.
When a household member has a communicable illness, when there is visible bodily fluid, or when a medical condition makes infection risk high, use an EPA-registered disinfectant on the label’s stated contact time after cleaning. Natural alternatives handle routine soil well; they are not a substitute for disinfection in those situations. EPA Safer Choice program guidance is a reasonable starting point for identifying products with verified safer ingredients.
Choosing between them
A practical split: keep a vinegar spray and a box of baking soda for routine soil and scale, keep a labeled hydrogen peroxide bottle for grout and caulk, and keep one EPA-registered disinfectant for illness and high-risk situations. That combination covers the tasks in this guide without overbuying. Families weighing both approaches can review these eco friendly house cleaning alternatives for families before stocking up.
Safety and Surface Compatibility: What to Avoid
Vinegar damages natural stone, unsealed grout, and some metal finishes. Baking soda paste can dull polished surfaces if scrubbed hard.
Ventilation is not optional. Even natural ingredients release fumes in a small bathroom, so run the fan and crack a window.
CDC guidance on safe household chemical use reinforces keeping cleaning products separated and clearly labeled. Those habits matter more with homemade blends.
For households managing health or mobility limits, the effort of DIY deep cleaning is the real constraint. Professional cleaning vs DIY for wellness covers when handing off the work makes more sense, and deep cleaning vs regular cleaning explained clarifies what a true deep clean involves before committing to either path.
Book a Professional Natural Deep Clean with North Shore Maids
A full natural deep clean takes hours and reaches places a weekly wipe-down never touches. North Shore Maids offers green cleaning products upon request, backed by nearly two decades of experience and a bonded, insured team.
Readers ready to hand off the work can follow these steps to find local deep cleaning experts or simply request a free estimate and let a trained crew handle the scrubbing, grout, and hard-water stains with natural products.
The gap between a wiped-down bathroom and a genuinely deep-cleaned one shows up in grout lines, caulk, and fixtures.
Frequently Asked Questions
How can I clean my bathroom naturally?
Start with a white vinegar and water spray for most surfaces, then use a baking soda paste for stains and grout. For disinfection, apply hydrogen peroxide, let it dwell for a few minutes, and wipe. Always ventilate and test on a hidden spot first. A routine of weekly deep cleaning with these natural deep cleaning alternatives keeps soap scum and mildew in check without harsh chemical sprays.
What is the best homemade cleaner for bathrooms?
A 1:1 mix of white vinegar and water in a spray bottle handles everyday grime and hard-water stains. For tougher jobs, a paste of baking soda and water provides gentle abrasion. Many people also use a blend of dish soap, hydrogen peroxide, and water for disinfecting. The best choice depends on the surface: avoid vinegar on natural stone, and never mix vinegar with bleach.
Can vinegar damage bathroom surfaces?
Vinegar’s acidity can etch natural stone like marble, travertine, and limestone, and it may wear down grout sealant over time. It is safe for ceramic tile, glass, and most porcelain fixtures. Always test a small area first, and rinse thoroughly after use. For natural stone, use a pH-neutral cleaner or a dedicated stone-safe product instead.
How often should you deep-clean a bathroom?
A full deep clean once a week prevents soap scum and mildew from taking hold. High-traffic bathrooms or those with poor ventilation may need attention twice weekly. Between deep cleans, wipe down showers after each use and spray surfaces with a natural shower cleaner. A consistent routine reduces the need for heavy scrubbing and keeps natural alternatives effective.
